


- acornsandaprons
- Mar 1, 2021
- 3 min read

A popular material to make solar system crafts with kids is to buy styrofoam balls and paint them, but let’s face it Styrofoam isn’t environmentally friendly. So we came up with an alternative to buying new materials for a solar system craft by up-cycling used Christmas tree ball Ornaments. The easy part is that they already have hooks on the top for hanging. You can also buy secondhand Christmas tree balls for this project. Any colour will work because you’ll be putting modelling clay over the entire bulb, or you can paint the bulbs. Up-cycling for an art project is a great eco-friendly way to go about crafting and we couldn’t be happier with the results!

Different ways to create your solar system using Christmas balls:
#1. You can use modelling clay that doesn’t harden but it will set hard if it is left somewhere cold for an hour, like a fridge or outside in the wintertime, It will keep its form. That way you can buy a package of kid’s coloured modelling clay that has all the colours you need and no painting is required, that is the method we chose. .
#2. You can also use air drying clay and paint it after you sculpted the clay around the ball, to add texture to the ball.
#3. Painting right onto the ball is the third option and doesn’t require clay at all, you will need a glass jar to help hold it while you paint.


Materials:
Old Christmas Balls - various sizes
Kid’s Modelling clay - assortment of colours
Rolling pin
String or clear thread
Wreath ring or metal crafting circle (or cut one out of cardboard)
Scissors

Directions:
Create one planet at a time, choose a large ball for the larger planets and smaller balls for the smaller plants. See below for big and small planet description.
Match the clay colours with the colours of each planet, described below.
Roll out the colour you want with a rolling pin to make the clay flat and thin.
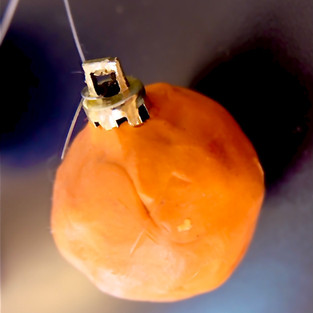
wrap the clay around the Christmas ball so that it covers the entire ball, add more clay over any spots that are still showing and work it with your fingers until you sculpt it all onto the Christmas ball the way you’d like. Make sure to leave the top hole uncovered
To add multiple colours to your ball you can mix them prior to rolling them out, or roll out one colour then lay flat strips of another colour over top and roll the clay again to flatten them together.
Once the planets are all sculpted string them together by first putting a string through the hole of the Christmas balls and tying a knot. We used clear thread for that part.
scroll down to see further instructions


The Planets in our Solar System:
Mercury - small ball - white and grey
Venus - medium ball - orange or white and orange
Earth - medium ball - green and blue
Mars - small ball - red or blue and red
Jupiter - large ball - yellow and orange
Saturn - large ball - yellow and white and orange
Uranus - large ball - light blue
Neptune - large ball - dark blue (navy blue)
☀️ The Sun - x-large or large ball - yellow

Stringing the planets onto the metal ring:
You can string up your planets however you’d like along a ring. The steps below are how we hung our planets to the metal medium sized ring .
We created four parts on the ring by tying the string onto it in a cross.
Attach two seperate ball strings onto the same area as one of the 4 points. Using a shorter string for one planet and longer string for the other planet. Placing the planets that are closer to the sun on shorter pieces of string and the ones further away on longer string.
Attach the string for the sun in the exact centre part of the ring by tying it onto the middle part of the cross.
Add one more piece of sting for the top section to hang onto the ceiling by tying both of the ends onto both sides of the ring.


We hope you have fun creating this solar system craft. If you create this craft feel free to tag us on Instagram @acorns.and.aprons and we will feature it as a story.

Comments