


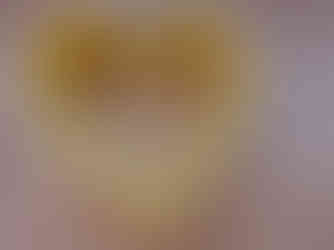
These nature- inspired 3D hearts are ornaments to hang near a window, allowing light to enter the peekaboo areas of the hearts. They are also cute hanging outside as wind chimes, and to let your neighbours know that they are loved. They make the perfect Valentines craft but are also fun anytime of year to spread love.
A twist on 3D paper hearts, we added birch bark to the outer layer. This not only looks interesting it is functional, adding a bit of protection to the paper if you wanted to hang it outside.
Creating crafts with items found in nature can bring a touch of the outside back inside. Creating inspiration and interesting textures to your home decor.
You can learn colours and math while creating this craft, measure out the lengths in a decreasing pattern to get the right measurments.

Materials for this craft:
Coloured cardstock paper or construction paper.
Tape, glue or a stapler — pick how you want to attach the paper strips together to create a heart. There is no set way, we used a stapler.
Birch Bark — whole pieces work best but long strips also work.
String to hang it up.
Scissors or a paper cutter


Directions:
Creating Birch bark hearts:
1. Make a bend by folding in the birch bark outward at the hearts bottom point. You may want to work with thin pieces or wet them to make sure they don’t snap.
2. Make another fold in the top half, directly opposite as your first bend but this time push the fold inwards, creating to bumps for the heart.
If you are working with a strip of birth bark, fold the upper half and glue or staple it together like you would to make the paper hearts.


For the paper hearts:
1. Cut out strips about 1 inch to 2 inches wide on coloured paper. If the paper isn’t long enough you need to glue two strips together.

2. Decide which colour you want for the shortest and which will be the longest. To make sure that the birch bark will fit, you may want to measure your longest first so that it fits perfectly into the birchbark heart.

3. Cut each strip 1-2 inches shorter than each other in order of colour or lay each strip on top of each other in the order of the rainbow and make them two inches apart. Then cut the other end (right) on a straight line, where the very bottom strip stops.

4. Fold the two ends in towards each other and staple (or tape or glue) them together from inside the middle.


5. Place a bend in the middle part at the very bottom, so it becomes the point of the heart.


6. Fold every colour the same way, first by placing the end pieces together and then staple them together, then fold the middle part of the strip at the bottom to make the point of the heart

We made pink the smallest, by making the strip the shortest. Than the purple is an inch longer than the pink, the blue is an inch longer than the purple, the green is an inch longer than the blue, the yellow is an inch longer than the green, the orange is an inch longer than the yellow, the red is an inch longer than the orange.


7. Stack each heart into each other, placing the small one in the middle and largest one on the outside.

8. Staple the bottom to secure them altogether

9. Place the birch bark around the entire 3D paper hearts and secure it on by stapling, glueing it. We stapled the red to the very top.


10. Put a strong throught the middle part of the birth bark and tie a knot, so that it’s read to hang.

Display your heart outside as a wind chime.


we hope that you enjoy making this fun nature-inspired 3D heart craft. If you make this craft, feel free to tag us on Instagram @acorns.and.aprons. We would love to see your creations and will feature it as a story! You can also email acornsandaprons@gmail.com to share your photos with us.
